XNAT Desktop Client
For the most up-to-date instructions on downloading and installing XNAT Desktop Client please see the official documentation: https://wiki.xnat.org/xnat-tools/xnat-desktop-client-dxm
Connecting to Monash XNAT
You must use alias tokens instead of your normal user login credentials to connect via XNAT Desktop Client.
IMPORTANT: Treat your alias tokens as you would your username and password. Do not share them or store them insecurely.
Alias tokens can be generated as follows:
-
Log into Monash XNAT in your browser (https://xnat.monash.edu/)
-
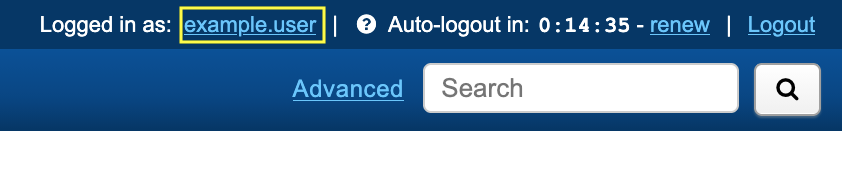
Click on your username in the top right-hand corner of the page:
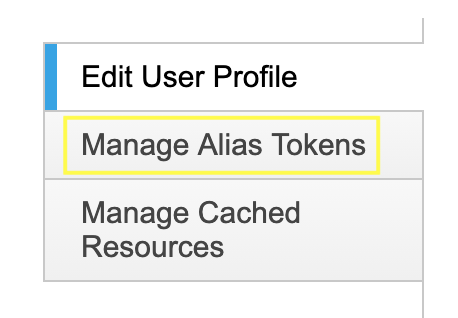
- Click Manage Alias Tokens in the sidebar:
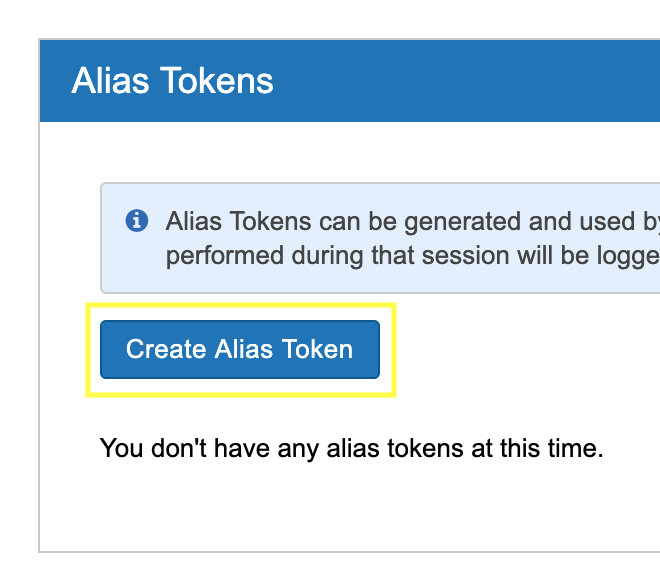
- Click Create Alias Token:
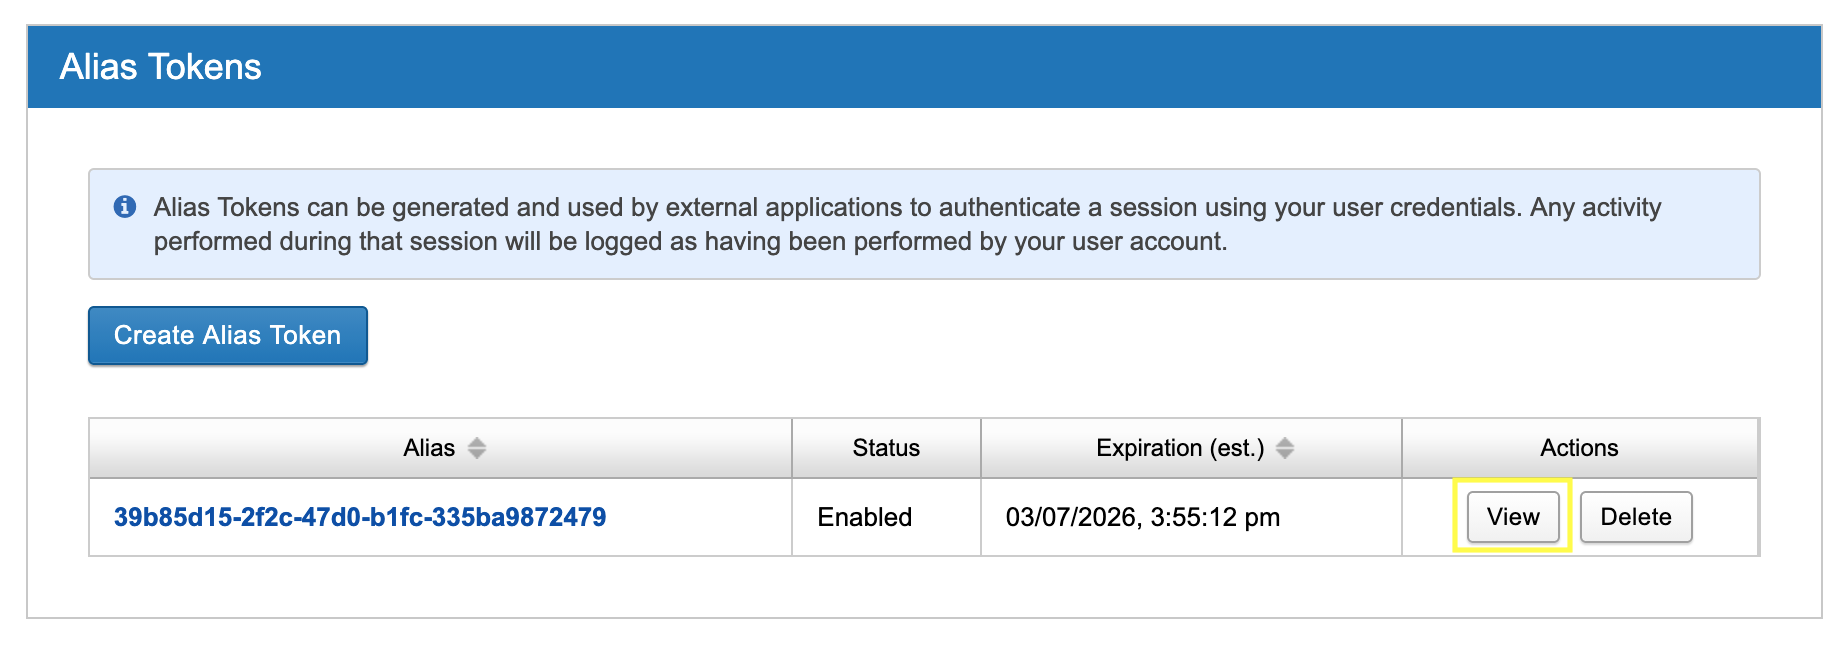
- Click View in the newly added row. Note the values for alias and secret in the pop-up screen:

-
Launch XNAT Desktop Client
-
To modify an existing connection click its corresponding button. To add a new connection click Add New XNAT Server
-
Enter
https://xnat.monash.eduas the server -
Enter the alias value as noted earlier as the username, and the secret value as the password
-
Click Login
Please note that as an additional security measure, alias tokens expire in 30 days and will need to be regenerated using the above steps.